rake ml:learn - AWS Machine Learning through rake
11 Apr 2017Automating the creation of your machine learning (ML) model can allow your services to evolve over time, automatically. This article assumes you have used the AWS ML Web Interface or have some understanding of AWS ML.
Ideally, we would have a model that would use Stochastic Gradient Descent and would learn per query. But when you want a low maintenance solution such as AWS ML, that isn’t an option, since AWS ML models are immutable by design.
You can, however, retrain a new model and then flip the switch so queries go to the new endpoint.
In our setup, achieving this requires a classic Extract, Transform, Load or ETL. This article will be focusing on that last step Load. And the hardest step in the AWS ML load: Creating Data Sources.
Before we talk about load though, let’s set up a simple extract and transform so we all have contexa and are on the same page.
Extract
- Specific to your business logic
- Can be skipped in this simple example and fed directly into the transform
- More complicated examples might require getting data dumps from multiple databases or other teams
module Machine
  class Extractor
    def self.perform
      CSV.open(Rails.root.join("tmp", "extracted_data.csv"), "w") do |csv|
        ImportantData.find_each do |data|
          csv << data.to_csv
        end
      end
    end
  end
end
Transform
- Critical step involves converting your raw data into features to be ingested by AWS Machine Learning models
- What those features are depends on your data and your machine learning model, whether it be simple linear regression or a deep neural network
- Figuring out features is outside the scope of this article but read Machine Learning Long Ids for some more insight, or better yet, take Andrew Ng’s Machine Learning Course
module Machine
  class Transformer
    def self.perform(filename = Rails.root.join("tmp", "extracted_data.csv"))
      Dir.mkdir('tmp') unless File.exists?('tmp')
      AwsMlTransformer.new(filename, "tmp/intermediary.csv").write
      FeatureExpanderWriter.new("tmp/intermediary.csv", "tmp/features.csv").write
    end
  end
end
Load
This is the good stuff. Check out the steps listed in the method below and we’ll walk through each line.
module Machine
  class Loader
    def self.perform(filename=Rails.root.join("tmp","features.csv"))
      instance = new
      instance.upload_data_to_s3(filename)
      instance.create_data_sources
      instance.create_model
      instance.create_evaluation
      instance.create_realtime_endpoint
    end

    ...
All of these make use of the AWS SDK v2 for Ruby.
Upload Data to S3
- AWS ML needs access to your S3 bucket
- This can be done with a bash script as explained on Amazon’s website
- Example below uses awscli, which can be
installed with
brew install awscli - Replace
dev.machinelearningservice.dimroc.comwith your bucket
- Using the AWS Ruby SDK v2, upload the
features.csvfile
  def upload_data_to_s3(filename)
    puts "uploading #{filename} to S3..."
    self.data_file = filename

    client = Aws::S3::Client.new
    File.open(filename, "rb") do |f|
      client.put_object(
        bucket: bucket_name,
        key: "uploads/#{File.basename(filename)}",
        server_side_encryption: "AES256",
        body: f)
    end
  end
Create Data Sources
This is the hardest step in the load stage. If all you read is this section, you’ll be much better for it.
  def create_data_sources
    puts "Creating data sources from S3..."

    # Create Data Source For both Model and Evaluation
    self.model_data_source_id = "learn-mds-#{timestamp}"
    self.evaluation_data_source_id = "learn-eds-#{timestamp}"

    # Training
    ml_client.create_data_source_from_s3({
      data_source_id: model_data_source_id,
      data_source_name: "Model Source: LearnSample 0-70 #{timestamp}",
      compute_statistics: true, # Required to create ML Model
      data_spec: {
        data_location_s3: data_location,
        data_schema: data_schema.to_json, # More on this below
        data_rearrangement: data_rearrangement.to_json
      }
    })

    wait_for_ml(:data_source_available) # Block until complete

    # Evaluation
    ml_client.create_data_source_from_s3({
      data_source_id: evaluation_data_source_id,
      data_source_name: "Evaluation Source: LearnSample 70-100 #{timestamp}",
      compute_statistics: true,
      data_spec: {
        data_location_s3: data_location,
        data_schema: data_schema.to_json,
        data_rearrangement: data_rearrangement(true).to_json
      }
    })

    wait_for_ml(:data_source_available)
  end
The code above performs a few key steps:
- Compute statistics
- Necessary to train the ML Model as mentioned in the documentation
- Data Rearragement
- Used when you want to split a data source into two using
complementcomplementtells AWS to split a data source into two, one for training and one for evaluation. Documentation.-
  def data_rearrangement(complement=false)
    {
      splitting: {
        percentBegin: 0,
        percentEnd: 70,
        strategy: "random",
        complement: complement
      }
    }
  end
- More documentation can be found here
- Used when you want to split a data source into two using
- Data Schema
- Describes each csv column with AWS Machine Learning metadata. The example below is for a Multiclass Classification Model
-
{ "version" : "1.0", "rowId" : null, "rowWeight" : null, "targetAttributeName" : "policy", "dataFormat" : "CSV", "dataFileContainsHeader" : true, "attributes" : [ { "attributeName" : "policy", "attributeType" : "CATEGORICAL" }, { "attributeName" : "length", "attributeType" : "NUMERIC" }, { "attributeName" : "base_10", "attributeType" : "NUMERIC" }, { "attributeName" : "digit_1", "attributeType" : "NUMERIC" }, { "attributeName" : "digit_2", "attributeType" : "NUMERIC" } ], "excludedAttributeNames" : [ ] } - More information here
That was a lot. Each section warrants a decent write up, so for not, I recommend reading the high level information about data rearrangement and data schema.
Rest assured though, it’s far simpler from here on out. The rest is really just API calls using the IDs you just received.
Create Model From Data Source
  def create_model
    puts "Creating model..."
    self.ml_model_id = "learn-ml-#{timestamp}"
    ml_client.create_ml_model({
      ml_model_id: ml_model_id,
      ml_model_name: "ML model: LearnSample #{timestamp}",
      ml_model_type: "MULTICLASS",
      training_data_source_id: model_data_source_id,
      parameters: {
        "sgd.maxPasses" => "20",
        "sgd.shuffleType" => "auto"
      }
    })

    wait_for_ml(:ml_model_available)
  end
Create Evaluation
  def create_evaluation
    puts "Creating evaluation..."
    self.evaluation_id = "learn-ev-#{timestamp}"
    ml_client.create_evaluation({
      evaluation_id: evaluation_id,
      evaluation_name: "Evaluation: LearnSample #{timestamp}",
      ml_model_id: ml_model_id,
      evaluation_data_source_id: evaluation_data_source_id
    })

    wait_for_ml(:evaluation_available)
  end
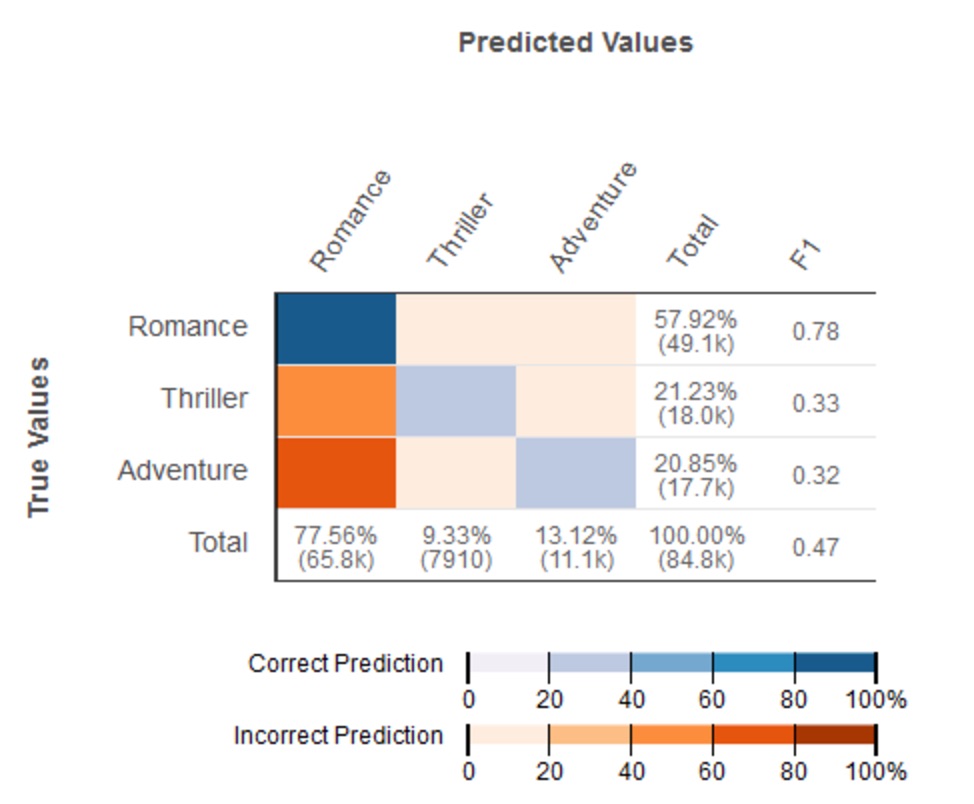
- Generates a performance visualization

Create Realtime Endpoint
Expose your service!
  def create_realtime_endpoint
    puts "Creating realtime endpoint..."
    response = ml_client.create_realtime_endpoint({ml_model_id: ml_model_id})

    puts "Machine Learning Complete! Update your ENV variables with the following:"
    puts
    puts "export AWS_ML_MODEL_ID=#{ml_model_id}"
    puts "export AWS_ML_PREDICTION_URL=#{response.realtime_endpoint_info.endpoint_url}"
    puts
  end
Wire it all up with rake
namespace :ml do
  desc "Transforms raw extracted data into format that's ingestable by AWS Machine Learning"
  task :transform => :environment do
    Machine::Transformer.perform
  end

  desc "Loads pre transformed data into AWS Machine Learning"
  task :load => :environment do
    Machine::Loader.perform
  end

  desc "Transform and load raw insurance number policy data into AWS Machine Learning"
  task :learn => [:transform, :load]
end
In bash or your scheduled job:
rake ml:learn
Run it weekly to keep your machines learning.